- Create an account at KickFire.com/signup and click on the account activation email.
- Log in to your KickFire API account and select API to continue.
- Name the API access point.
- Select the endpoint:
- Company − “Translate this IP address or domain to company firmographics”
- Domain2IP − ”Uncover the IP addresses owned/used by this domain”
- IP2Geo − ”Discover geographic information for an IP address”
-
Optional: Enter domains or IP addresses authorized to call the access point and click Create Access Point.
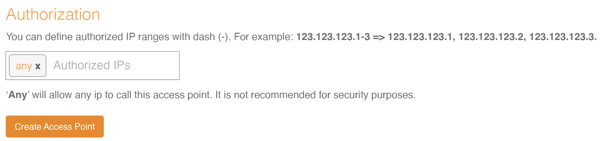
- Domain Authorization: Any top-level domains using client-side API calls (such as: KickFire for Google or KickFire for Adobe) will need to be authorized by your Customer Success Manager.
(Note: If you received the Error Message: Company API Error: URL Not Authorized, please contact support@kickfire.com for authorization assistance.) - IP Address Authorization: Enter IP addresses authorized to call the access point and click Create Access Point.
- Domain Authorization: Any top-level domains using client-side API calls (such as: KickFire for Google or KickFire for Adobe) will need to be authorized by your Customer Success Manager.
- Use the interactive interface to build the API query string.

- Copy the query string and view the sample JSON output.
