Before connecting your webhook, please be sure to have a Marketo marketing program, landing page, and web form in place.
Getting Started
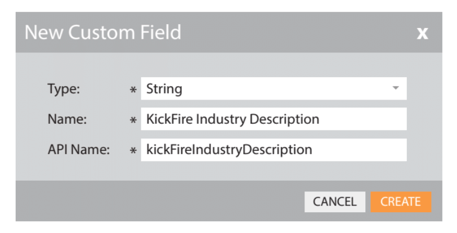
Create multiple, new custom fields for the KickFire data responses
- Go to: Admin > Database Management > Field Management > New Custom Field
- Set the Custom Field Type as String and create a name for the custom field(s)
- Repeat this step as needed
- Go to: Admin > Webhooks > New Webhook
- Name the webhook and click Insert Token
- Select: {{company.Website}} > Insert
- Replace the {{company.Website:default=edit me}} URL with:
https://api.kickfire.com/v3/company:(all)?website={{company.Website:default=edit me}}&key= - Log in to the KickFire API portal. From the API tab, copy the company endpoint API key.
Need help creating an API key? Refer to Getting Started with KickFire API. - Back in the Marketo platform, append the unique KickFire API key to the URL.
Final result: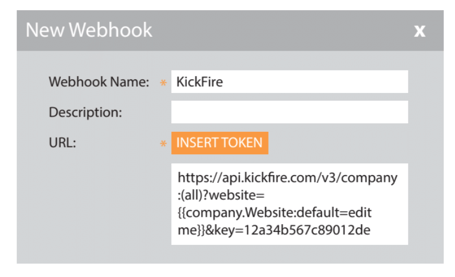
- Set the Request Type as GET > Response Type as JSON > Click Create

Set Custom Header
8. Go to: Webhook Actions > Set Custom Header > Click Add.
9. Replace Header text with authorization and in the Value field, type: bearer[space][API key]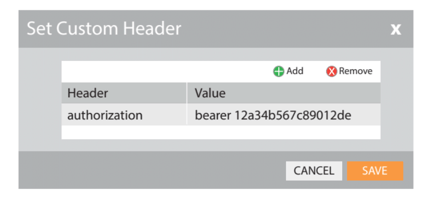
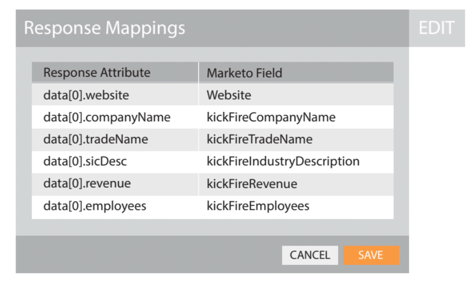
Edit Response Mappings
The Response Attribute fields come directly from the KickFire API JSON output.
10. Under Response Mappings, click Edit.
11. In the first Response Attribute field, type in: data[0].website and set the Marketo Field as
Website. Please note: KickFire API Response Attributes are case sensitive.
12. The additional Response Attribute fields will be based on the desired KickFire API data,
which can be mapped to existing Marketo Fields or newly created custom fields.
Create New Smart Campaign
13. Navigate to Marketing Activities and click New > New Smart Campaign.
14. Select the Campaign Folder that contains the approved landing page and web form >
Name the campaign > Click Create.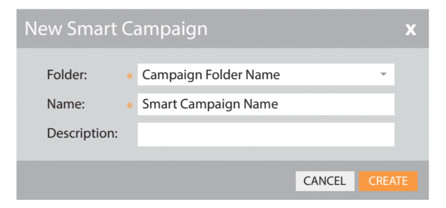
15. From the left panel, click on the Smart Campaign > Smart List.
16. Drag and drop Fills Out Form trigger. Select the form that is in your landing page.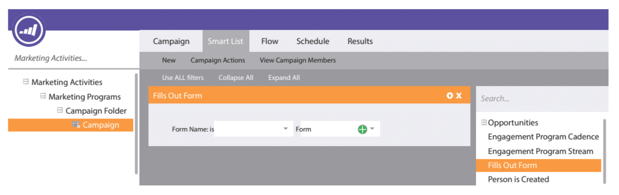
17. Click Flow > Integration > Call Webhook > Drag and drop webhook created in Step 2.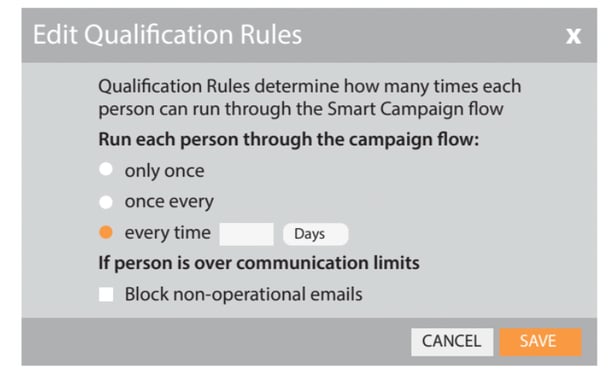
18. Click Schedule > Edit > Select Every Time > Save.
19. Click Activate and your KickFire webhook in Marketo is complete!