MyAPI allows you to combine your custom first-party data attributes to personalize KickFire’s Company API response for a specified set of accounts. Segment, filter, and combine important "known" data, such as Account Watchlist, Account Tier, Sales Agent, Sales Territory, and more to meet your team's needs.
Preparing Your MyAPI Data File
Configure KickFire for Adobe MyAPI Fields
Refreshing Your MyAPI Data File
Preparing Your MyAPI Data File
- The first column must be the company domain and should NOT include any https://, www, page names, or trailing URL data. (Example: acme.com)
- The subsequent 10 column headers will contain your custom data fields. (Example: watchlist, accountOwner, accountTier)
- All 10 column headers must be present, even if empty.
- Any fields that contain a comma must be enclosed by double-quotes. (Example: “Customers, Upsell List”)

- Save as a .csv file. Your .csv file should look like this:

KickFire MyAPI Setup & Upload
- Log in to KickFire API.
Need help creating an API key? Refer to Getting Started with KickFire API - Select the API key that matches your MyAPI data file.
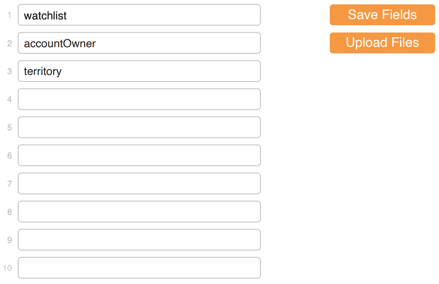
- Under the MyAPI tab, enter your MyAPI field label names to match your data file. Click Save Fields.
- Click Upload File to upload your MyAPI data file.
- Your MyAPI setup is complete. Continue on to configure your Adobe integration.
Configure KickFire for Adobe MyAPI Fields
Be sure you have completed the KickFire for Adobe setup in Adobe Launch.
Need help? Refer to KickFire for Adobe Setup Guide.
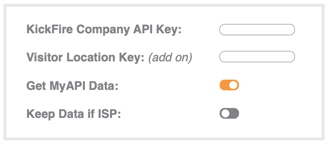
- In Adobe Launch, navigate to the KickFire Extension.
- Toggle ‘Get MyAPI Data’ to the ON position and ‘Keep Data if ISP’ to the OFF position. Click Save.
- Click Data Elements > Add Data Element.
- Name the Data Element to match the MyAPI fields. Set Extension to KickFire and Data Element Type to MyAPI.
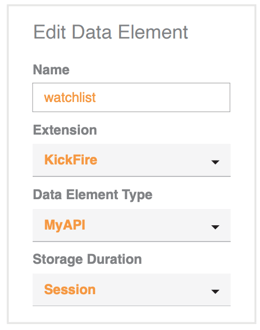
- In the configuration screen, enter the custom KickFire data value to be mapped to the Adobe Launch data element based on your MyAPI field labels from KickFire MyAPI Setup & Upload Step 2.

- Your KickFire MyAPI configuration into Adobe is complete!
Refreshing Your MyAPI Data File
Work with your team on the cadence of updating. Most teams update on a weekly, monthly, or quarterly basis. For questions, please contact our Customer Success & Support team.