How to Build a KickFire Integration in Adobe
This article instructs you on how to get started with KickFire for Adobe, including adding data elements, configuring standard rules, mapping data values to variables, and sending data to Adobe Analytics and Target.

Install and Configure KickFire Launch Extension
Map KickFire Data Values to Adobe Variables
Send data to Adobe Analytics, Target, etc.
Install and Configure KickFire Launch Extension
1. From the Launch Extension catalog, find the KickFire extension and select Install.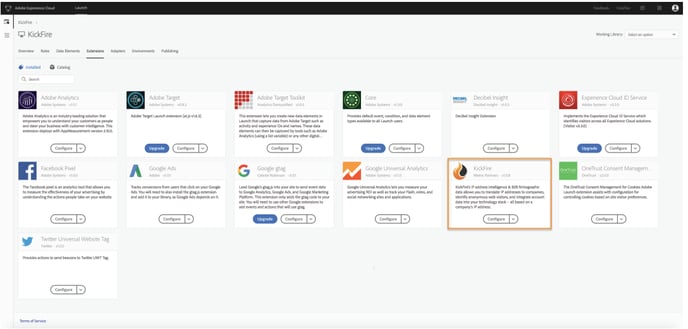
2. Required: Enter your KickFire Company API Key.
Need help creating an API key? Refer to Getting Started with KickFire API.
Optional:
- If you have been provided a Visitor Location Key, enter this in the second field.
- Toggle to collect MyAPI data.
- Toggle to collect information if an ISP IP is detected.
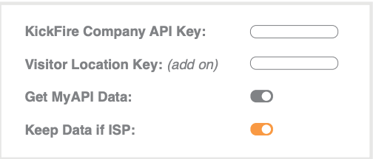
3. Click Save at the end of configuration.
Add Data Elements
4. Go to: Data Elements > Add Data Element.
5. Enter the name of the element to be set.
6. Select the “KickFire” extension.
7. Select the Data Element Type (Company or MyAPI™), based on API source.
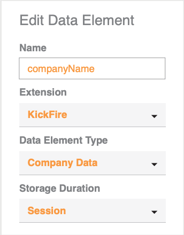
8. In the configuration screen, enter the KickFire data value to be mapped to the Adobe Launch data element. This value must match the KickFire API data value exactly.
9. Repeat Steps 4-8 to create additional data elements for any other KickFire values you would like to capture.
Configure Standard Rules
There are 2 standard rules for configuration. If you have custom processes, please consult your Adobe Admin for any additional rules.
Rule 1 – Implements the Launch Extension The first rule is required in order to capture KickFire data:
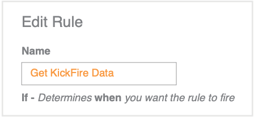
10. Go to: Rules > Add Rule.
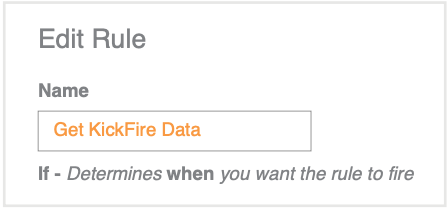
10a. Name the rule: Get KickFire Data.
 10b. Events > Add.

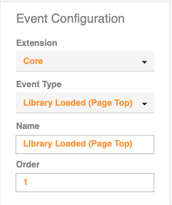
10c. Extension: Core > Event Type: Library Loaded (Page Top) > Name: Library Loaded (Page Top) > Order: 1 > Keep Changes. Note: Rule order determines which rule runs first when an event is triggered. If two rules have the same event type, the one with the lowest number will run first.
10d. Actions > Add.
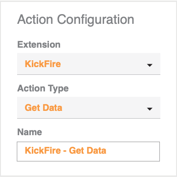
10e. Extension: KickFire > Action Type: Get Data > Name: KickFire - Get Data > Keep Changes.
Map KickFire Data Values to Adobe Variables
The suggested place to map the KickFire data values to Adobe variables is in the "set variables" action of your existing main page load rule.
11a. Go to: Rules and open your main page load rule
11b. Edit the "set variables" action.

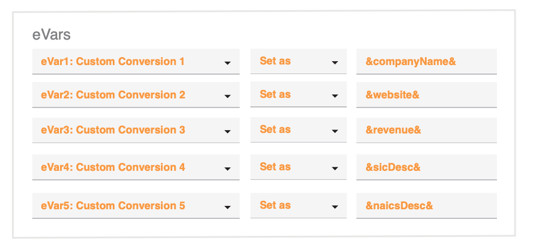
11c. Map your preferred eVars to the data elements you added in Steps 4-9. Your mappings may look similar to this:
11d. Click Keep Changes.
11e. Save the updated rule.
11f. Publish to Deployment or Production and your KickFire integration is complete!
(Optional) Rule 2 – Sends data to Adobe Analytics, Target, etc.
If for any reason your KickFire data needs to be sent separate from your page load rule, configure a separate "Direct Call" call rule that will collect KickFire values. Please note that entry/bounce rates can be impacted since this Direct Call rule is triggered on the entry of the site.
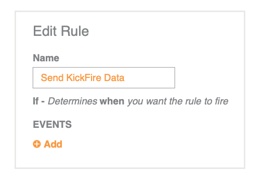
12a. Name the rule: Send KickFire Data.
12b. Events > Add.
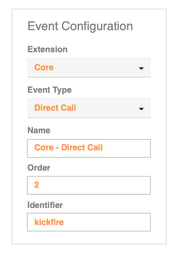
12c. Extension: Core > Event Type: Direct Call > Name: Core - Direct Call > Order: 2 > Identifier: kickfire.
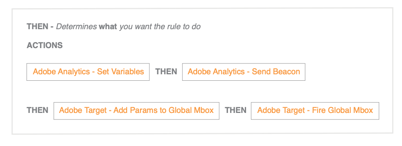
12d. Actions > Add.
12e. For Adobe Analytics: Adobe Analytics - Set Variables > THEN > Adobe Analytics - Send Beacon.
For Adobe Target: Adobe Target - Add Params to Global Mbox > THEN > Adobe Target - Fire Global Mbox.
13f. Save this Rule.
13g. If you utilize this optional rule configuration, be sure to publish to Deployment or Production to complete your KickFire integration.