
Required: KickFire API key, Form Enrichment script, and access to Eloqua Form tag on website.
Need help creating an API key? Refer to Getting Started with KickFire API.
Configure Eloqua Database Fields
Navigate to: Settings > Database Setup > Fields & Views
1. Configure the KickFire data fields that will be stored in Eloqua. Choose to add KickFire
data fields under Contact Fields or Account Fields.
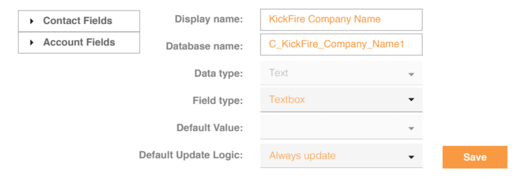
2. Add a KickFire custom field, enter the Display Name, set the Field Type as Textbox, and
the Default Updated Logic to Always Update. Click Save.
Please note: Some data fields may be considered Personally Identifiable Information (PII). Please review before capturing in Eloqua.
Configure Eloqua Forms
Navigate to: Assets > Forms
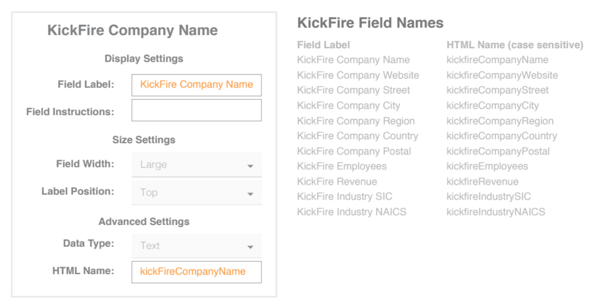
3. Add custom hidden fields to the form. Update the Field Label to reference the KickFire
data point, and update the HTML Name to match the KickFire Field Names.
4. For each hidden field added, go to the field’s Validation settings, uncheck the box for
Must not contain any URLs and set the maximum number of characters to 255.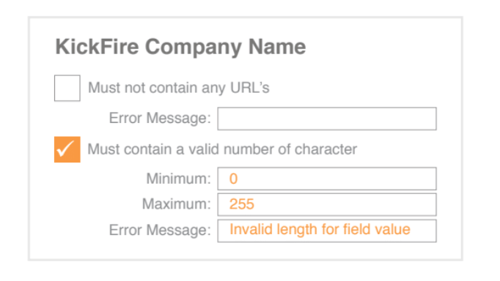
5. Save the changes to the form and click on Processing.
6. Add a processing step to either update Contact Fields or Account Fields with form data.
Please note: The Processing step must match your choice in Step 2.
7. Map the hidden form fields using Source Field and Target Field from the drop-down menu.
The target fields will include the custom fields you created in Step 2. 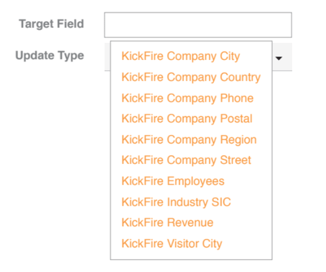
8. Save the changes made to the Processing Steps.
Update Eloqua Form Tag
9. Click Actions >> icon and select View Form HTML.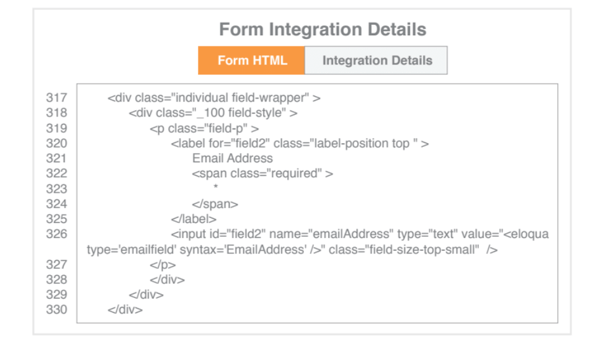
10. Copy and paste the Form HTML and update website page URL or landing page.
11. Locate Email Address input field in the Form HTML and add event: onblur="kfAPI()"
<input id="field0" name="emailAddress" type="text" value="<eloqua type='emailfield'
syntax='EmailAddress' />" class="field-size-top-small" onblur="kfAPI()" />
12. Add the KickFire Form Enrichment script, provided by our Support team, below the
closing div of the Eloqua form.
13. Update the var kfkey variable with KickFire Company Endpoint API key.
14. Publish the changes made to website page URL or landing page.
Confirm Data Is Collecting in Eloqua
Navigate to: Analytics > Classic Insight > Reports & Dashboard > Forms > Form Submission Data
15. Select a time span or enter a start and end date for form submission.
16. Select the form to display and click Run Report to review the collected data.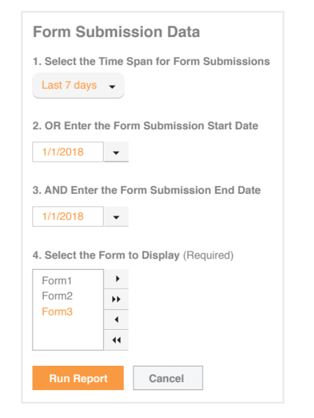
17. Congratulations, the KickFire integration is complete!